
How to Make Your Bathroom Waterproof: A Comprehensive Guide
Bathrooms are among the most common areas in a home where water-related issues can arise. Whether it’s a small leak, moisture buildup, or full-blown water damage, these problems can be costly and challenging to address. Making your bathroom waterproof is essential to prevent these issues and ensure your bathroom remains in pristine condition. In this comprehensive guide, we will walk you through the steps and strategies to ensure your bathroom stays dry and damage-free.
The Importance of Waterproofing
Waterproofing your bathroom is not just about protecting it from unsightly stains and damage; it’s about safeguarding your home’s structural integrity and your family’s health. Here are some reasons why waterproofing is essential:
Preventing Water Damage
Water damage is not only unsightly but can also lead to expensive repairs. Leaks and seepage can damage your bathroom fixtures, walls, and flooring, and even spread to adjacent rooms if left unchecked.

Mold and Mildew Prevention
Bathrooms are susceptible to high humidity and moisture, creating the ideal environment for mold and mildew growth. Waterproofing prevents these fungi from thriving, promoting a healthier indoor environment.
Longevity of Fixtures
Water damage can significantly reduce the lifespan of your bathroom fixtures and surfaces. Proper waterproofing ensures they remain in good condition for years to come.
How to Make Your Bathroom Waterproof
Now that you understand the importance of waterproofing, let’s delve into the methods and steps to make your bathroom waterproof:
1. Choose Waterproof Materials
Start with the basics by using waterproof materials for your bathroom’s construction. Opt for water-resistant drywall, cement backer boards, and moisture-resistant paint for the walls. For flooring, consider materials like ceramic tiles, porcelain tiles, or vinyl, which are naturally waterproof.
2. Seal Gaps and Joints
Water can sneak into your bathroom through gaps and joints in the walls and floors. Seal these areas using waterproof caulk or sealant. Pay special attention to areas around the bathtub, shower, and sinks.
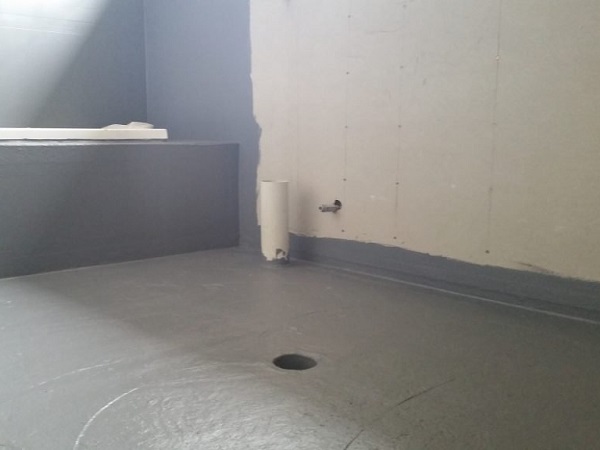
3. Waterproofing Membranes
A waterproofing membrane is a critical component of bathroom waterproofing. You can install it under the tile or wall coverings to create a barrier that prevents water from penetrating the surface. There are various types of membranes, including sheet membranes and liquid membranes, each with its advantages. https://allsydneywaterproofing.com/
4. Water-Resistant Shower and Bathtub Surrounds
Your shower and bathtub areas are particularly susceptible to water damage. Ensure that the surrounds and enclosures are made from water-resistant materials like fiberglass or waterproof drywall. Properly seal the edges and corners to prevent water from seeping through.
5. Waterproofing the Bathroom Floor
The bathroom floor is constantly exposed to water and moisture. To waterproof it effectively, consider the following:
Install a waterproof underlayment beneath the floor tiles.
Use epoxy grout for tile joints; it’s highly water-resistant.
Seal the edges and corners of the floor with waterproof caulk.
6. Proper Ventilation
Proper ventilation is key to reducing humidity and moisture in the bathroom. Install an exhaust fan that can efficiently remove moisture from the air. Use it during and after showers to maintain a dry environment.
7. Regular Maintenance
Even after waterproofing your bathroom, it’s important to perform regular maintenance to ensure its longevity. Check for any cracks, loose tiles, or damaged seals, and address them promptly to prevent water intrusion.
DIY vs. Professional Waterproofing
While some aspects of bathroom waterproofing can be tackled as DIY projects, others may require the expertise of a professional. Here’s a breakdown of when you might want to consider each option:
DIY Waterproofing
Sealing gaps and joints.
Applying water-resistant paint.
Installing exhaust fans.
Regular maintenance and inspections.
Professional Waterproofing
Installing waterproofing membranes.
Replacing or repairing damaged drywall or flooring.
Addressing structural issues that contribute to water damage.
Complex tile and grout work in showers and baths.
The decision to hire a professional or do it yourself should be based on the complexity of the project and your comfort level with the necessary tasks.
Conclusion
Incorporating effective waterproofing measures into your bathroom construction or renovation is crucial to protect your home, your investment, and your family’s health. By choosing the right materials, sealing gaps, and using waterproofing membranes, you can create a watertight barrier that will keep your bathroom in top condition for years to come. Don’t forget that proper ventilation and regular maintenance play a vital role in the longevity of your bathroom’s waterproofing. Whether you decide to tackle this project as a DIY enthusiast or enlist the help of professionals, ensuring your bathroom remains waterproof is a decision that will pay off in the long run, saving you from costly repairs and maintaining a clean, healthy living environment.