What is the strongest waterproofing?

Exploring the Pinnacle of Waterproofing

The Importance of Strong Waterproofing

Waterproofing is a critical aspect of construction and maintenance. It shields structures from water damage, which can be not only costly to repair but also hazardous to the integrity of a building. In this article, we delve into the strongest waterproofing methods available, ensuring the utmost protection against water intrusion.

What is the strongest waterproofing?

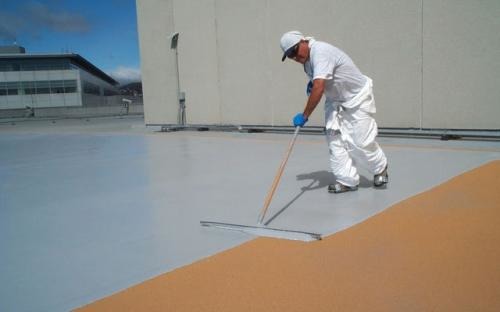
1. Polyurethane Coatings

The Versatile Power of Polyurethane

Polyurethane coatings are renowned for their versatility and high-performance capabilities in waterproofing. These coatings create a strong, seamless barrier that can be applied to various surfaces, including roofs, walls, and foundations. Here’s why polyurethane is considered one of the strongest waterproofing options:

Key Advantages of Polyurethane Coatings

  • Seamless Protection: Polyurethane forms a continuous, impermeable layer that effectively keeps water out.
  • Durability: These coatings can withstand harsh weather conditions and UV exposure, maintaining their strength over time.
  • Flexibility: Polyurethane is flexible and can adapt to the movement of building materials without cracking or peeling.
  • Chemical Resistance: It resists damage from chemicals and is suitable for industrial applications.

2. EPDM Roofing

EPDM’s Superior Resilience

EPDM (ethylene propylene diene terpolymer) roofing is another strong contender in the world of waterproofing. It is commonly used on flat or low-slope roofs and offers exceptional waterproofing strength:

Benefits of EPDM Roofing

  • Proven Performance: EPDM has a long track record of providing robust protection against water infiltration.
  • Resistance to the Elements: It can withstand extreme temperatures, UV exposure, and harsh weather conditions without degrading.
  • Low Maintenance: EPDM requires minimal maintenance, reducing long-term costs.
  • Longevity: With proper care, EPDM roofs can last for several decades, making them a cost-effective choice.

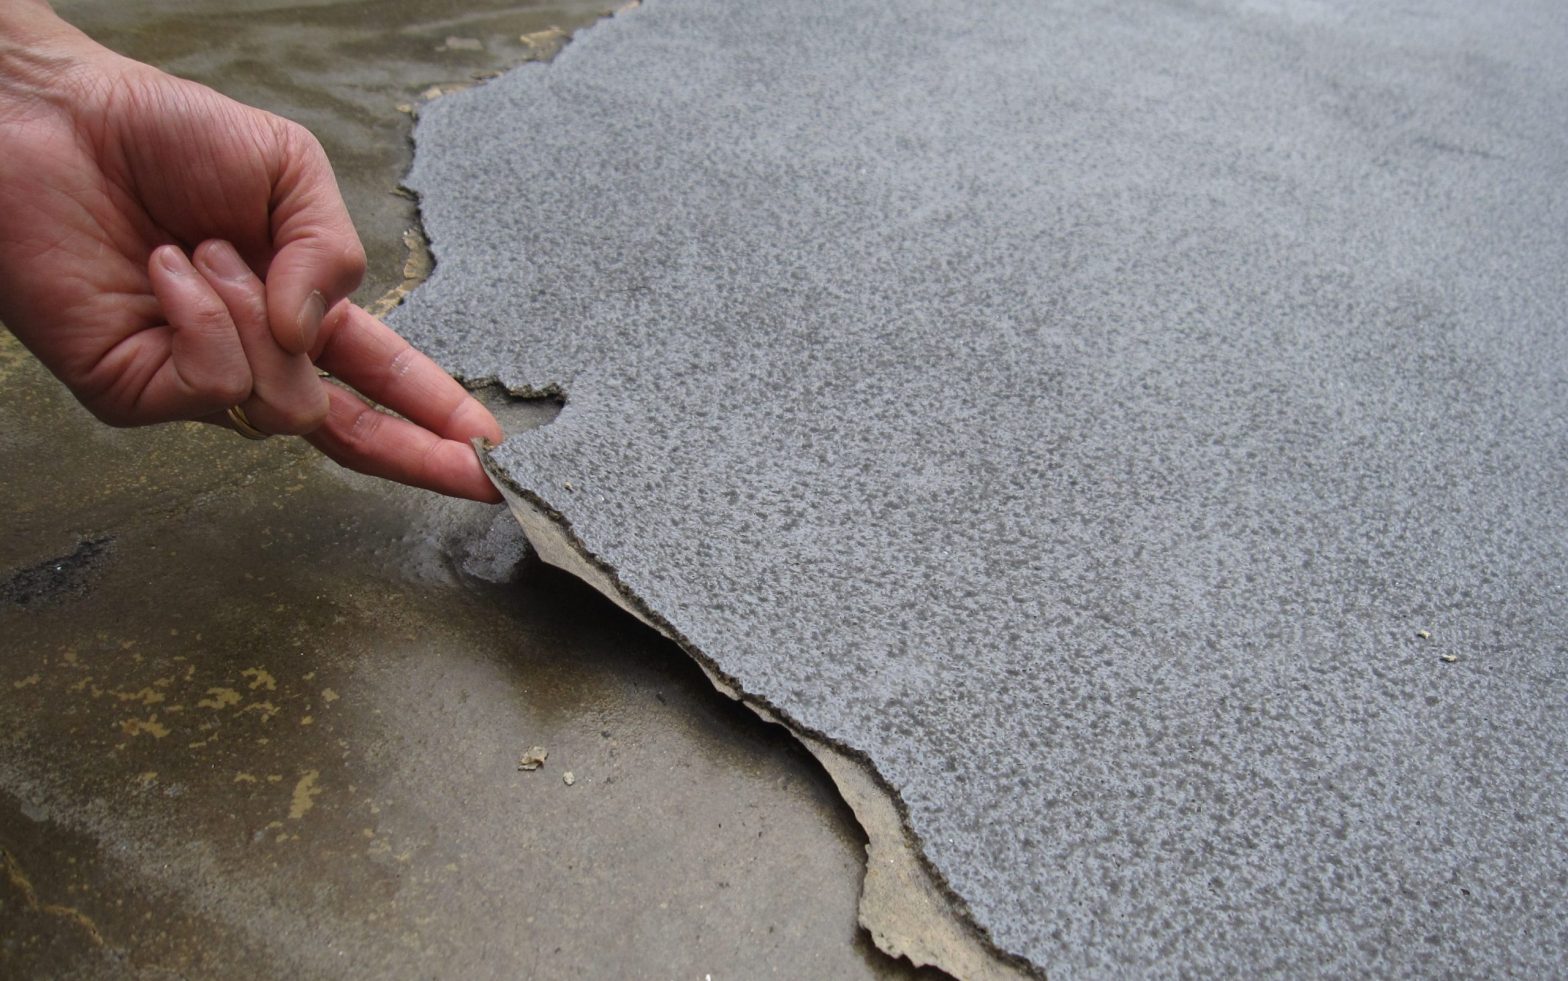
3. Concrete Waterproofing

The Strength of Concrete

When it comes to building foundations and basements, concrete waterproofing is an indispensable choice. Properly treated concrete can offer exceptional strength against water penetration:

Advantages of Concrete Waterproofing

  • Integrated Protection: Waterproof additives or coatings can be mixed into the concrete during construction, creating a water-resistant structure from the start.
  • Structural Integrity: Concrete’s inherent strength complements its waterproofing capabilities, ensuring the foundation’s longevity.
  • Versatility: Concrete waterproofing can be applied in various forms, such as membranes or crystalline admixtures.
  • Cost-Effective: It is a budget-friendly solution that offers robust protection over time.

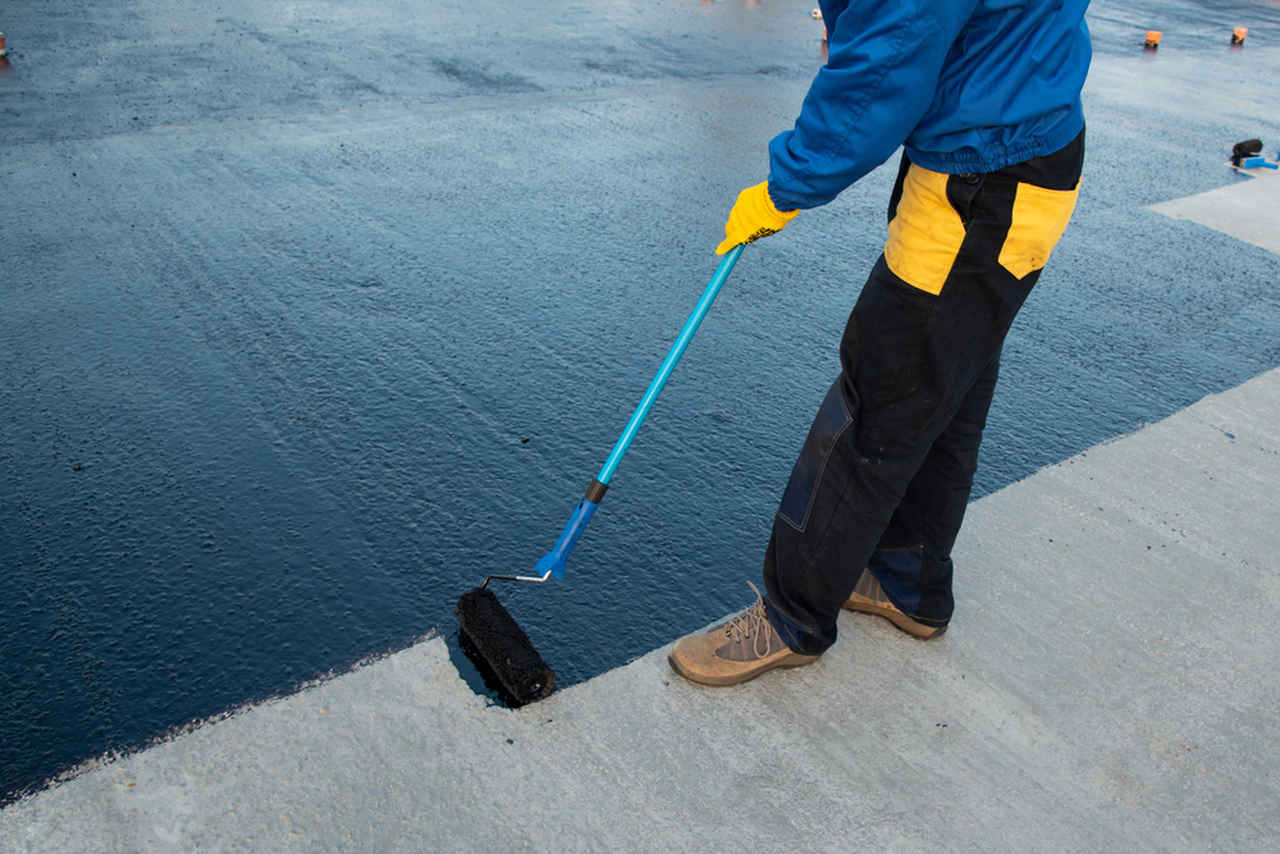
4. Liquid Rubber Coatings

The Seal of Liquid Rubber

Liquid rubber coatings are known for their exceptional sealing properties. They are widely used in roofing, tank lining, and other applications where superior waterproofing is a must:

strongest waterproofing?

Why Liquid Rubber is a Strong Choice

  • Monolithic Seal: Liquid rubber forms a seamless, monolithic barrier that leaves no room for water to infiltrate.
  • Resilience: It endures extreme temperature fluctuations, making it suitable for both cold and hot climates.
  • Easy Application: Liquid rubber can be applied with relative ease, reducing installation time and costs.
  • Long-Lasting: Its durability ensures long-term waterproofing protection, even in the face of harsh environmental conditions.
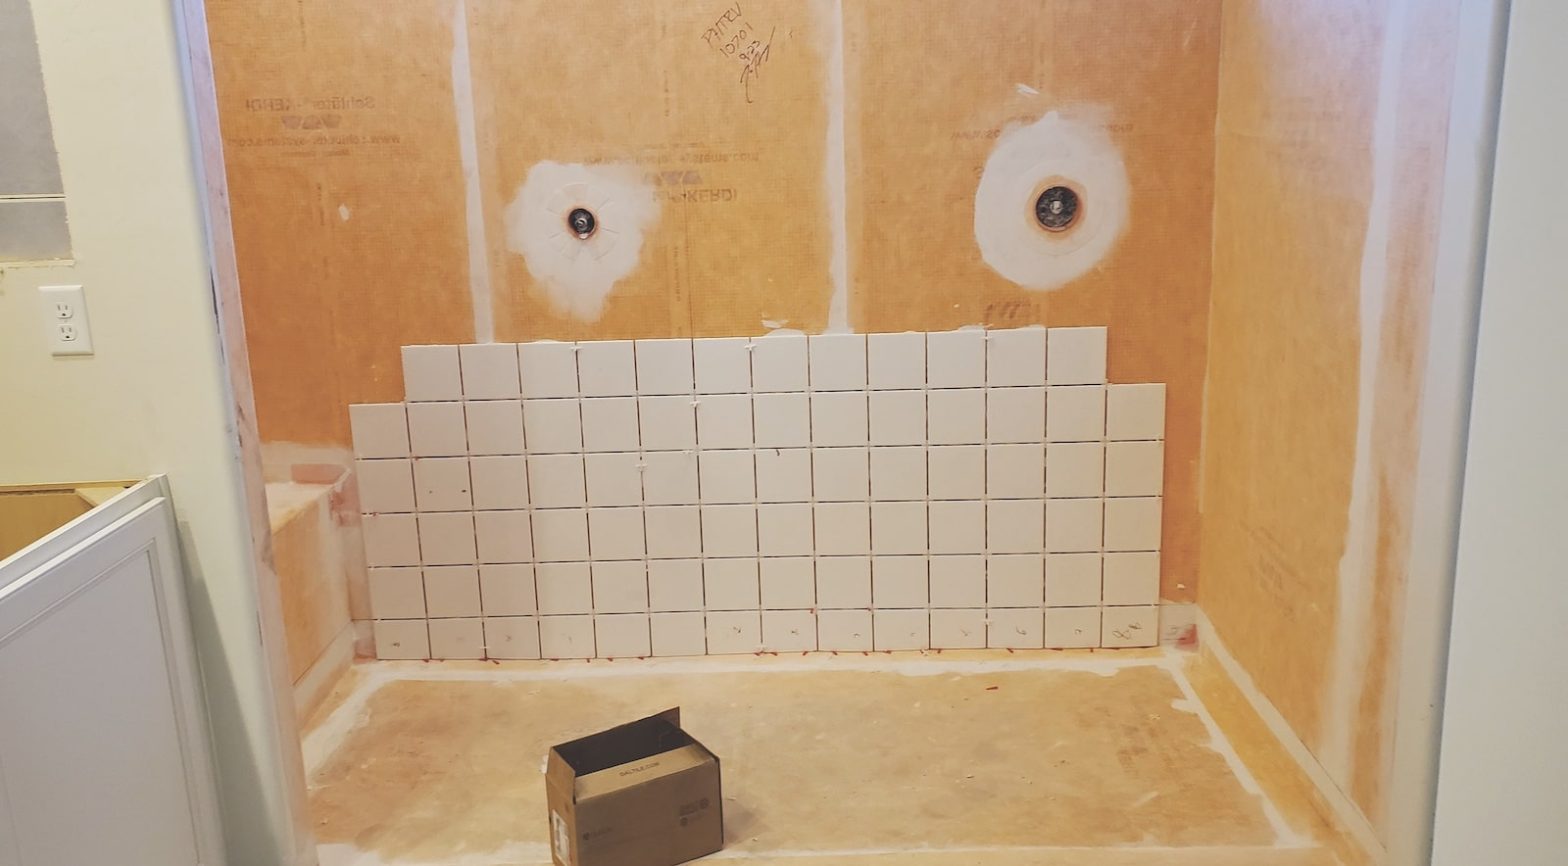
5. TPO Roofing

TPO’s Impenetrable Shield

Thermoplastic Olefin (TPO) roofing is a popular choice for flat and low-slope roofs. It’s known for its strength and resistance to water intrusion:

Advantages of TPO Roofing

  • Energy Efficiency: TPO roofs reflect sunlight, reducing cooling costs and contributing to energy savings.
  • Strength and Flexibility: TPO combines the strength of rubber with the flexibility of plastic, making it resilient and long-lasting.
  • Resistance to UV and Chemicals: TPO is highly resistant to UV rays and chemical exposure, ensuring its durability.
  • Easy Maintenance: It requires minimal maintenance, saving you time and money in the long run.

Choosing the Right Waterproofing Solution

Factors to Consider

When selecting the strongest waterproofing method for your project, consider the following factors:

Project Type

Assess whether you need waterproofing for a roof, foundation, basement, or other surfaces. Different methods may be more suitable for specific applications.

Climate and Environment

Consider the local climate and environmental conditions, as they can affect the performance of waterproofing materials. Some solutions may excel in extreme temperatures, while others may be more appropriate for mild climates.

Budget

Your budget will also play a significant role in determining the best waterproofing method. While some options may provide superior strength, they could be cost-prohibitive for certain projects.

Maintenance Requirements

Think about the level of maintenance you’re willing to commit to over the long term. Some waterproofing solutions require minimal upkeep, while others may demand more regular attention.

By carefully evaluating these factors and consulting with experts, you can make an informed decision on the strongest waterproofing method that aligns with your needs and budget. Remember that the right choice can lead to long-lasting protection and peace of mind.


What is the easiest waterproofing method?

Understanding Waterproofing

Waterproofing is a crucial aspect of building maintenance and construction. It ensures that structures remain dry and protected from water damage. Whether you’re dealing with a basement, roof, or any other part of your home or building, finding the easiest and most effective waterproofing method is essential. In this article, we’ll explore some of the simplest and most reliable ways to keep your property water-resistant.

1. Exterior Waterproofing

One of the most effective and straightforward methods to waterproof your home is through exterior waterproofing. This method involves creating a barrier on the outside of your building to prevent water from penetrating the foundation or walls. It’s highly recommended for both new construction and existing structures. Here are some key steps involved in exterior waterproofing:

What is the easiest waterproofing method?

Key Steps in Exterior Waterproofing

  • Excavation: The first step involves digging around the foundation to expose the exterior walls.
  • Clean the Surface: Clean and inspect the surface for any cracks, holes, or damage that needs repair.
  • Apply Waterproof Membrane: Install a waterproof membrane, which can be in the form of a liquid, sheet, or spray, to create a barrier against moisture.
  • Drainage System: Ensure proper drainage by adding weeping tiles and a sump pump to divert water away from the foundation.
  • Backfill and Restore: Once the membrane is in place, backfill the excavated area and restore the landscaping.

Exterior waterproofing is a long-term solution that provides excellent protection against water intrusion. It’s best performed by professionals with experience in the field, as it requires specialized knowledge and equipment.

2. Interior Waterproofing

Interior waterproofing is another effective method to keep your basement dry and prevent water damage. This approach focuses on managing water that has already entered your home. While it may not be as comprehensive as exterior waterproofing, it’s often more accessible for DIY enthusiasts. Here’s how it works:

Key Steps in Interior Waterproofing

  • Seal Cracks and Holes: Identify and seal any cracks or holes in the basement walls and floor to prevent water seepage.
  • Install Interior Drainage System: Place a perimeter drainage system, like a French drain, to collect and redirect water to a sump pump.
  • Use Waterproof Paint or Coating: Apply waterproof paint or coating to the interior walls to prevent moisture penetration.
  • Proper Ventilation: Ensure good ventilation to reduce humidity and the risk of mold growth.
  • Regular Maintenance: Periodically check for any signs of water damage and address them promptly.

Interior waterproofing is a more cost-effective option compared to exterior waterproofing. However, it’s essential to address the root causes of moisture issues, such as poor drainage, to achieve the best results.

3. Waterproofing Sealants

If you’re looking for a quick and easy way to waterproof various surfaces, waterproofing sealants can be a handy solution. These sealants come in various forms, including liquid, spray, and caulk, and are suitable for a wide range of applications. Some common uses of waterproofing sealants include:

Common Uses of Waterproofing Sealants

  • Roof Repairs: Sealants can be used to patch up small roof leaks and prevent water from entering your home.
  • Bathroom and Kitchen: Waterproof sealants can protect tiles and grout from moisture, preventing water damage and mold growth.
  • Foundation Cracks: Seal foundation cracks with waterproof sealants to keep your basement dry.
  • Windows and Doors: Seal around windows and doors to prevent water from seeping inside.

While waterproofing sealants are convenient for small-scale projects and quick fixes, they may not be a long-term solution for extensive waterproofing needs. Regular maintenance and reapplication may be required.

Choosing the Right Method for You

Ultimately, the easiest waterproofing method for you depends on your specific needs, budget, and the extent of the waterproofing required. Exterior waterproofing provides the most comprehensive protection but can be costly and is best left to professionals. Interior waterproofing is more accessible for DIY enthusiasts and can address existing moisture issues effectively. Waterproofing sealants are handy for quick fixes and small-scale projects but may not be a long-term solution for significant waterproofing needs.

Before deciding on the best method, assess the condition of your property and consult with a waterproofing expert if necessary. Combining methods and taking proactive measures to prevent water intrusion will ensure your home or building remains dry and secure for years to come. For different waterproofing methods see here.

easiest waterproofing method?


What happens if you don’t prime before waterproofing?

What Happens If You Don’t Prime Before Waterproofing

Understanding the Importance of Waterproofing

Waterproofing is a crucial step in maintaining the structural integrity and longevity of a building. Whether it’s your home, a commercial property, or an industrial facility, protecting it from water damage is essential. While many people are aware of the importance of waterproofing, what often gets overlooked is the significance of priming before waterproofing. In this article, we will explore why priming is a vital preparatory step before waterproofing and what can happen if you skip it. What happens if you don’t prime before waterproofing?

Priming: The Foundation of Successful Waterproofing

Before delving into the consequences of skipping the priming step, let’s first understand what priming is and why it’s so essential in the waterproofing process.

Priming is the application of a specialized primer or bonding agent to the surface that needs to be waterproofed. This primer is designed to enhance the adhesion between the waterproofing material and the substrate, whether it’s concrete, wood, metal, or any other surface. The purpose of priming is to create a strong and durable bond between the waterproofing material and the substrate, ensuring that water cannot penetrate the structure.

There are several reasons why priming is crucial in the waterproofing process:

Improved Adhesion: Priming promotes better adhesion between the waterproofing material and the substrate. This ensures that the waterproofing membrane or coating adheres securely to the surface, preventing water from seeping through.

Enhanced Durability: A properly primed surface is more durable and resistant to wear and tear. It helps the waterproofing system withstand the test of time and the elements.

What happens if you don't prime before waterproofing?
What happens if you don’t prime before waterproofing?

Seamless Application: Priming creates a smooth and even surface for the application of the waterproofing material. This prevents air pockets and gaps that could compromise the waterproofing barrier.

Reduced Risk of Blisters and Delamination: Without proper priming, the waterproofing material may blister or delaminate over time, leading to water infiltration and damage to the structure.

The Consequences of Skipping the Priming Step

Now that we’ve established the importance of priming, let’s explore the potential consequences of skipping this crucial preparatory step before waterproofing:
1. Poor Adhesion:

Without proper priming, the adhesion between the waterproofing material and the substrate is compromised. This results in a weaker bond that is more susceptible to separation over time. Poor adhesion can lead to water infiltrating the structure, causing damage to the building materials and potentially compromising the structural integrity of the building.
2. Water Infiltration:

One of the most significant consequences of not priming before waterproofing is water infiltration. Water can find its way through even the smallest gaps or weak points in the waterproofing system. Without the strong bond created by priming, water can penetrate the structure, leading to issues such as mold growth, rot, and structural damage.
3. Reduced Longevity:

A waterproofing system that hasn’t been properly primed is likely to have a shorter lifespan. The lack of adhesion and durability can result in the need for more frequent repairs and reapplications of the waterproofing material. This not only adds to the maintenance costs but also disrupts the normal operation of the building.
4. Costly Repairs:

Skimping on priming can lead to expensive repairs down the road. Once water damage occurs, fixing the issues may require extensive work, including the removal and replacement of damaged materials and the waterproofing system. The cost of these repairs can be significantly higher than the initial investment in proper priming.
5. Health Hazards:

Water infiltration caused by inadequate waterproofing due to the absence of priming can create an environment conducive to mold growth. Mold not only damages the structure but also poses health risks to occupants. Mold spores can cause respiratory issues and other health problems, making it a serious concern.
6. Legal Liabilities:

If your building is used for commercial or residential purposes, failing to provide adequate waterproofing can lead to legal liabilities. Water damage can affect tenants’ belongings, and in some cases, lead to legal disputes and claims for property damage. It’s essential to meet building codes and standards to avoid legal issues.

 if you don't prime before waterproofing?

The Priming Process

To avoid the aforementioned consequences, it’s essential to follow a proper priming process before waterproofing. Here are the key steps involved in priming:
1. Surface Preparation:

The first step in the priming process is surface preparation. This involves cleaning the surface thoroughly to remove any dirt, debris, or contaminants. The surface should be clean, dry, and free from any loose materials.
2. Selection of the Right Primer:

Choosing the correct primer is critical. The type of primer you need depends on the substrate material and the type of waterproofing system you plan to use. Consult with a professional or the manufacturer of the waterproofing product to ensure you select the right primer.
3. Application of Primer:

The primer should be applied evenly to the surface using the recommended method and tools. It’s essential to follow the manufacturer’s instructions for application, including the recommended thickness and drying time.
4. Allowing for Cure Time:

After applying the primer, it’s crucial to allow it to cure for the recommended duration. This ensures that the primer forms a strong bond with the substrate, providing a solid foundation for the waterproofing material.
5. Waterproofing Application:

Once the primer has cured, you can proceed with the application of the waterproofing material. The bond between the substrate and the waterproofing material will now be strong, providing the desired protection against water infiltration. https://allsydneywaterproofing.com/

Conclusion

In summary, priming is an indispensable step in the waterproofing process. Skipping this crucial preparatory step can lead to a range of problems, including poor adhesion, water infiltration, reduced longevity, costly repairs, health hazards, and legal liabilities. To ensure the long-term protection and structural integrity of your building, always prioritize proper priming before waterproofing. Consult with professionals and follow manufacturer guidelines to guarantee the success of your waterproofing project. Remember, an ounce of prevention in the form of priming can save you from pounds of costly repairs and potential legal troubles in the future.

What is the best form of waterproofing?

Choosing the Best Form of Waterproofing

Waterproofing is an essential aspect of construction and maintenance, ensuring that structures remain durable and protected from the elements. When it comes to waterproofing, there are several options available, each with its unique advantages and disadvantages. In this article, we’ll explore the best forms of waterproofing and help you make an informed decision for your specific needs.

Understanding the Importance of Waterproofing

Before we dive into the best forms of waterproofing, it’s crucial to understand why waterproofing is so vital. Water infiltration can lead to structural damage, mold growth, and other issues, significantly impacting the integrity of a building. Waterproofing acts as a barrier to prevent water from seeping into a structure and causing these problems.

What is the best form of waterproofing?

The Best Forms of Waterproofing

Liquid Applied Waterproofing

Liquid applied waterproofing is a popular choice for a wide range of applications. This method involves applying a liquid membrane directly onto the surface, which then cures into a seamless, protective layer. It’s often used on roofs, decks, and even in basements.

Advantages:

  • Seamless application for excellent coverage.
  • Adheres well to various surfaces, including concrete, metal, and wood.
  • Can be applied in a variety of temperatures and weather conditions.

Disadvantages:

  • May require multiple coats for optimal effectiveness.
  • Proper application is critical to avoid leaks or delamination.
  • Can be more expensive than some other options.

Sheet Membrane Waterproofing

Sheet membrane waterproofing involves installing a barrier in the form of sheets or rolls. These sheets are made from various materials, including asphalt, rubber, or thermoplastic. They are applied to the surface and provide a durable, waterproof shield.

Advantages:

  • Highly durable and resistant to damage.
  • Excellent for large, flat surfaces like roofs and foundations.
  • Relatively easy to install with proper training.

Disadvantages:

  • Can be less flexible than liquid membranes, making it less suitable for complex shapes or designs.
  • Seams and joints may require special attention to prevent leaks.
  • May have limitations in extreme temperature conditions.

Cementitious Waterproofing

Cementitious waterproofing involves the use of a cement-based mixture that is applied to surfaces like concrete. This method creates a rigid, protective barrier that is highly resistant to water penetration. It is commonly used in applications like basements and water tanks.

best form of waterproofing?

Advantages:

  • Excellent adhesion to concrete surfaces.
  • Durable and long-lasting solution.
  • Resistant to UV exposure and extreme weather conditions.

Disadvantages:

  • Not suitable for non-concrete surfaces.
  • May require multiple layers for maximum effectiveness.
  • Cracking and shifting in the substrate can lead to water infiltration over time.

Hybrid Waterproofing Systems

Hybrid waterproofing systems combine two or more waterproofing methods to leverage the strengths of each. For instance, a hybrid approach might involve using a liquid-applied membrane in conjunction with sheet membrane in areas with complex shapes or joints, providing comprehensive protection.

Advantages:

  • Optimal waterproofing tailored to the specific needs of a project.
  • Versatility and adaptability to various surfaces and conditions.
  • Enhanced durability and resistance to water infiltration.

Disadvantages:

  • May require more expertise in installation and selection of materials.
  • Can be more expensive due to the combination of methods.
  • Proper planning and execution are essential for success.

Choosing the Right Waterproofing Solution

When it comes to selecting the best form of waterproofing for your project, there is no one-size-fits-all answer. The right choice depends on various factors, including the type of surface, environmental conditions, budget, and long-term goals. It’s advisable to consult with a professional waterproofing contractor who can assess your specific needs and recommend the most suitable solution.

Conclusion

Waterproofing is a critical aspect of construction and maintenance, and the best form of waterproofing varies from project to project. Whether you opt for liquid applied waterproofing, sheet membrane waterproofing, cementitious waterproofing, or a hybrid system, it’s essential to choose the method that best suits your requirements. Remember that proper installation and maintenance are key to ensuring your structure remains protected from water infiltration for years to come. https://allsydneywaterproofing.com/waterproofing-services-sydney/


What are the 4 types of shower waterproofing?

The Four Types of Shower Waterproofing: A Comprehensive Guide

When it comes to building or renovating a bathroom, one of the most critical aspects is ensuring that your shower area is properly waterproofed. Without adequate waterproofing, you risk water damage, mold growth, and structural problems in your home. To help you understand the various methods of shower waterproofing, we will explore the four main types in this comprehensive guide. What are the 4 types of shower waterproofing?

1. Liquid Waterproofing Membranes

Liquid waterproofing membranes are a popular choice for shower waterproofing due to their versatility and ease of application. These products are typically available in two forms: liquid-applied and sheet membranes.

Liquid-Applied Membranes:

What are the 4 types of shower waterproofing?

Liquid-applied membranes are coatings that can be brushed, rolled, or sprayed onto the shower’s surface. They are often used for the entire shower area, including walls and floors. Liquid-applied membranes create a seamless barrier that prevents water from infiltrating the substrate. Some common liquid waterproofing products include RedGard, AquaDefense, and Mapelastic.

Sheet Membranes:

Sheet membranes, on the other hand, are pre-fabricated sheets made of materials like rubber, PVC, or CPE. They are cut to fit the shower’s dimensions and adhered to the substrate using adhesive or thin-set mortar. Sheet membranes are ideal for shower floors and are easy to install. Schluter-KERDI and NobleSeal are well-known sheet membrane products.

Liquid waterproofing membranes offer excellent waterproofing capabilities and are suitable for various substrates, including cement backer boards and drywall. They are particularly effective in preventing leaks and are often used in conjunction with other waterproofing methods.

2. Waterproofing Fabric and Mesh Systems

Waterproofing fabric and mesh systems are another popular choice for shower waterproofing. These systems consist of a waterproofing membrane, typically made of fabric or mesh, which is embedded in a thin-set mortar. The combination of the fabric or mesh and the mortar creates a strong, water-resistant layer.

How It Works:

Apply a layer of thin-set mortar to the substrate.
Embed the waterproofing fabric or mesh into the mortar.
Apply another layer of thin-set mortar over the fabric or mesh to encapsulate it.

This method is excellent for shower walls and is known for its durability and flexibility. It can be used in both residential and commercial applications. Popular products in this category include Wedi, USG Durock, and Schluter-KERDI.

3. Cement Backer Boards

Cement backer boards are a more traditional method of shower waterproofing. These boards are made of cement and reinforcement fibers, and they are installed on the shower’s walls and sometimes on the floor as well. While cement backer boards are not inherently waterproof, they provide a solid and stable surface for the application of waterproofing materials, such as thin-set mortar and waterproofing fabric.

Installation Process:

Secure the cement backer boards to the wall studs or floor joists.
Tape and fill the seams between the boards to create a continuous surface.
Apply a waterproofing membrane or waterproofing fabric and mesh system over the cement backer boards.

Cement backer boards are widely used in showers because of their durability and resistance to moisture. Popular brands in this category include HardieBacker, WonderBoard, and Durock.

4 types of shower waterproofing

4. Surface Waterproofing Systems

Surface waterproofing systems, also known as topical sealers, are designed to be applied directly to the surface of the shower substrate. These sealers come in various forms, including liquid-applied coatings and roll-on membranes. They are typically used in conjunction with other waterproofing methods, such as cement backer boards or waterproofing fabric and mesh systems, to provide an extra layer of protection.

Application Process:

Clean and prepare the substrate.
Apply the surface waterproofing sealer according to the manufacturer’s instructions. What are the 4 types of shower waterproofing?

Surface waterproofing systems are often used in showers to prevent water from seeping into grout lines and tile surfaces. They are suitable for both walls and floors. Some well-known products in this category include Aqua Mix Sealers, RedGard Waterproofing, and Laticrete Hydro Ban.

Choosing the Right Shower Waterproofing Method

When it comes to choosing the right shower waterproofing method, there are several factors to consider: https://allsydneywaterproofing.com/bathroom-waterproofing-sydney/

Substrate Type: The type of substrate you have (e.g., cement backer board, drywall, or concrete) will influence your choice of waterproofing method.

Budget: Some methods are more cost-effective than others, so your budget may play a significant role in your decision.

Installation Expertise: The ease of installation and your level of expertise in applying waterproofing materials should also be considered.

Shower Design: The design of your shower, including the size and shape, may affect which waterproofing method is most appropriate.

Local Building Codes: Be sure to check your local building codes and regulations, as they may dictate which waterproofing methods are acceptable.

In many cases, a combination of waterproofing methods may be used to ensure the highest level of protection. It’s essential to consult with a professional contractor or installer to determine the best approach for your specific shower project.

Conclusion

Proper shower waterproofing is crucial to the longevity and structural integrity of your bathroom. The four main types of shower waterproofing methods, including liquid waterproofing membranes, waterproofing fabric and mesh systems, cement backer boards, and surface waterproofing systems, offer various options to suit your specific needs and preferences.

Choosing the right method will depend on factors such as your budget, substrate type, and installation expertise. When in doubt, it’s always wise to consult with a professional to ensure that your shower remains a watertight and enjoyable part of your home for years to come.

Can you waterproof over old waterproofing?

Can You Waterproof Over Old Waterproofing?

When it comes to protecting your home from water damage, waterproofing is a critical step. Whether it’s your basement, roof, or any other part of your property, ensuring that it remains waterproof is essential to prevent costly repairs and potential structural damage. But what if you already have an existing waterproofing system in place? Can you waterproof over old waterproofing? In this article, we will explore the possibilities, limitations, and best practices for re-waterproofing areas that have previously been waterproofed.

The Importance of Waterproofing

Waterproofing is not just a matter of convenience; it is a fundamental aspect of maintaining the structural integrity of your property. Water intrusion can lead to a range of problems, including mold growth, wood rot, and even compromised foundation stability. In regions prone to heavy rainfall or flooding, waterproofing is crucial to protect your investment and ensure the safety of your family.

Can you waterproof over old waterproofing?

Assessing the Existing Waterproofing

Before you decide to waterproof over old waterproofing, it’s essential to assess the condition and effectiveness of the existing system. The viability of this approach largely depends on the type of waterproofing already in place. There are two primary types of waterproofing systems: external and internal.

External Waterproofing

External waterproofing typically involves the application of waterproof coatings, membranes, or materials on the outside of a structure. This is a common method for preventing water intrusion into basements and foundations. If your property has external waterproofing, inspect it for signs of damage, cracks, or wear. If the external waterproofing is still in good condition, it might be possible to add an additional layer for enhanced protection.

Internal Waterproofing

Internal waterproofing is often applied to the interior of basements and involves the use of drainage systems, sump pumps, and sealants. If you have an internal waterproofing system, check for any issues such as clogged drains, malfunctioning pumps, or deteriorating sealants. Addressing these problems may be sufficient to maintain the effectiveness of your existing waterproofing.

Can You Waterproof Over Old Waterproofing?

The answer to this question depends on several factors, including the type of waterproofing, its condition, and your specific goals. Here are some considerations for each scenario:

1. External Waterproofing

a. Adding a New Layer

If the external waterproofing is still in good condition, adding a new layer of waterproofing can provide extra protection. This may involve applying a fresh coat of waterproofing paint or installing a new waterproofing membrane. Ensure that the new layer adheres properly to the existing one for a watertight seal.
b. Patching and Repair

If the existing external waterproofing shows signs of damage, it’s crucial to address these issues before adding a new layer. Repair any cracks, holes, or wear and tear to ensure that the new waterproofing is effective. Be meticulous in your preparation to guarantee a seamless application.
c. Consultation with Professionals

waterproof over old waterproofing

It’s advisable to consult with waterproofing professionals before proceeding with any work on your external waterproofing. They can assess the condition of your existing system and provide expert recommendations for the best course of action.

2. Internal Waterproofing

a. Maintenance

For internal waterproofing systems, routine maintenance is key to ensuring their functionality. Check drainage systems, sump pumps, and sealants regularly. Replace or repair any components that show signs of wear or malfunction.
b. Enhancements

If you wish to improve the effectiveness of your internal waterproofing, enhancements can be made without completely starting from scratch. For instance, you can install a more robust sump pump, upgrade your drainage system, or reapply sealants in areas that need attention. For all sydney waterproofing services see here.

Considerations and Limitations

While it is possible to waterproof over old waterproofing in many cases, there are limitations and considerations to keep in mind:

Compatibility

Ensure that the new waterproofing materials are compatible with the existing ones. Mixing incompatible products can lead to adhesion issues and reduce the effectiveness of the waterproofing.

Surface Preparation

Proper surface preparation is crucial. All surfaces should be clean, dry, and free from contaminants before applying new waterproofing. Inadequate preparation can lead to poor adhesion and water leakage.

Professional Guidance

Consult with waterproofing professionals. They can help you determine the best approach, identify any underlying issues, and ensure that the job is done correctly.

Permit Requirements

In some regions, waterproofing work may require permits. Check with your local authorities to ensure you comply with any necessary regulations.

Conclusion

Waterproofing over old waterproofing is a viable option when done correctly. Whether you have an external or internal waterproofing system, maintaining its integrity is essential to protect your property from water damage. Regular inspection, maintenance, and professional guidance can help you make informed decisions and ensure the longevity of your waterproofing. Remember that each situation is unique, so it’s wise to assess your specific needs and consult experts in the field to achieve the best results. By taking the necessary steps to preserve and enhance your existing waterproofing, you can enjoy a dry, safe, and structurally sound home for years to come.

What is the cheapest way to waterproof a bathroom?

What is the Cheapest Way to Waterproof a Bathroom?

When it comes to bathroom renovations, ensuring that your space is waterproof is crucial. Water damage can lead to costly repairs and even health hazards if mold and mildew develop. But you don’t have to break the bank to waterproof your bathroom. In this article, we’ll explore some of the most cost-effective ways to protect your bathroom from water damage. What is the cheapest way to waterproof a bathroom?

1. Use Waterproof Paint

One of the most budget-friendly ways to waterproof your bathroom is by using waterproof paint. This type of paint is specially formulated to resist moisture, making it an excellent option for bathroom walls and ceilings. It creates a water-resistant barrier that helps prevent water from seeping through the walls and causing damage.

Waterproof paint is easy to apply, and it’s an ideal choice if you’re on a tight budget. However, keep in mind that it’s best used in combination with other waterproofing methods for maximum protection.

What is the cheapest way to waterproof a bathroom?

How to Use Waterproof Paint:

1. Clean and prepare the surface by removing any existing paint, dirt, or mildew.

2. Apply a primer designed for the type of surface you’re painting.

3. Use a high-quality waterproof paint and apply at least two coats for better coverage.

4. Allow the paint to dry thoroughly before using the bathroom.

2. Seal Grout and Tiles

Another economical way to waterproof your bathroom is by sealing the grout and tiles. Grout is a porous material, and water can penetrate it over time, leading to damage and mold growth. Sealing the grout lines and tiles will create a barrier that prevents water from seeping in.

You can find grout sealers in most hardware stores, and they are relatively easy to apply. Regularly resealing the grout and tiles is recommended to maintain their waterproofing effectiveness.

How to Seal Grout and Tiles:

1. Clean the grout and tiles thoroughly to remove any dirt and grime.

2. Allow the surfaces to dry completely before applying the sealer.

3. Using a small brush or roller, apply the grout sealer evenly over the grout lines and tiles.

4. Wipe off any excess sealer from the tiles before it dries.

3. Install a Shower Curtain or Splash Guard

If you’re looking for an affordable solution to keep water from splashing onto your bathroom floor, consider installing a shower curtain or a splash guard. These simple additions can help prevent water from spreading beyond the shower or bathtub area.

Shower curtains come in various styles and can be an attractive and cost-effective way to enhance your bathroom’s decor. Splash guards are usually made of clear plastic or glass and can be installed to create a barrier between the shower and the rest of the bathroom.

cheapest way to waterproof a bathroom

How to Install a Shower Curtain or Splash Guard:

1. Choose a shower curtain or splash guard that fits your bathroom’s design and dimensions.

2. Follow the manufacturer’s instructions for installation, whether it involves a curtain rod or attaching the splash guard to the wall.

3. Ensure that the curtain or splash guard effectively contains water during showers.

4. Caulk Around Fixtures and Joints

Leaky fixtures and joints can be a significant source of water damage in a bathroom. The good news is that you can prevent this by applying caulk around fixtures like faucets, showerheads, and the base of the toilet. Caulking creates a waterproof seal that prevents water from seeping into the gaps.

Caulk is an inexpensive product, and the application process is straightforward, making it a budget-friendly option for bathroom waterproofing.

How to Caulk Around Fixtures and Joints:

1. Clean and dry the area around the fixture or joint you plan to caulk.

2. Cut the tip of the caulk tube at a 45-degree angle and load it into a caulking gun.

3. Apply a continuous bead of caulk around the fixture or joint. Find out more here.

4. Use a wet finger or a caulk smoothing tool to create a neat, even seal.

5. Waterproof Flooring

Bathroom floors are highly susceptible to water damage, so it’s essential to choose a waterproof flooring option. While some waterproof flooring materials can be costly, there are budget-friendly choices like vinyl and linoleum that offer excellent water resistance.

These materials come in various styles, colors, and patterns, allowing you to achieve the look you desire without overspending. Additionally, they are relatively easy to install, making them an attractive option for DIY enthusiasts.

How to Install Waterproof Flooring:

1. Prepare the subfloor by ensuring it’s clean and level.

2. Follow the manufacturer’s instructions for laying the waterproof flooring material, whether it’s adhesive vinyl planks or linoleum sheets.

3. Pay attention to the seams and edges to ensure a watertight installation.

Conclusion

Waterproofing your bathroom doesn’t have to be a costly endeavor. By utilizing these cost-effective methods and materials, you can protect your bathroom from water damage while staying within your budget. Whether you choose to use waterproof paint, seal grout and tiles, install shower curtains or splash guards, caulk around fixtures and joints, or opt for waterproof flooring, these budget-friendly solutions will help you maintain a dry and secure bathroom.


Can you waterproof your own bathroom?

Can You Waterproof Your Own Bathroom?

The Importance of Bathroom Waterproofing

Bathrooms are one of the most frequently used areas in a home, and they are also prone to moisture-related problems. Without proper waterproofing, water can seep into the walls and floors, leading to structural damage, mold growth, and costly repairs. To avoid these issues, it’s essential to understand the importance of bathroom waterproofing. Can you waterproof your own bathroom?

Can you waterproof your own bathroom?

Why Is Bathroom Waterproofing Necessary?

Bathroom waterproofing is crucial for several reasons:

1. **Preventing Water Damage**: Bathrooms are exposed to high levels of moisture daily. Without waterproofing, this moisture can penetrate walls and floors, causing structural damage over time.

2. **Mold and Mildew Prevention**: Moisture build-up in your bathroom can create an ideal environment for mold and mildew to thrive. Waterproofing helps keep these harmful organisms at bay.

3. **Extended Lifespan**: Proper waterproofing can significantly extend the lifespan of your bathroom fixtures and materials. It prevents premature deterioration due to moisture exposure.

4. **Health and Safety**: Mold and mildew growth not only damage your bathroom but can also pose health risks. Waterproofing helps maintain a safe and healthy environment.

DIY Bathroom Waterproofing

You might be wondering if you can take on the task of waterproofing your own bathroom. While some bathroom renovation projects are best left to professionals, DIY bathroom waterproofing is feasible if you have the right tools, materials, and knowledge.

Steps for DIY Bathroom Waterproofing

Follow these steps to waterproof your bathroom effectively:

1. **Assess Your Bathroom**: Start by evaluating the current state of your bathroom. Identify areas that require waterproofing, such as shower walls, tub surrounds, and the bathroom floor.

2. **Gather Materials**: Purchase high-quality waterproofing products, including waterproof membrane, sealing tape, and waterproof adhesive. Ensure you have the necessary tools like trowels, brushes, and a utility knife.

3. **Prepare the Surface**: Before applying any waterproofing material, make sure the surface is clean, dry, and free from any debris. Remove old tiles and grout, and repair any cracks or holes.

4. **Apply Waterproof Membrane**: Use a waterproof membrane or coating to cover the areas that need waterproofing. This acts as a barrier to prevent water from seeping into the substrate.

5. **Sealing Joints and Corners**: Pay special attention to joints and corners, as they are common entry points for water. Use sealing tape and waterproof adhesive to create a watertight seal.

6. **Test for Leaks**: After applying the waterproofing materials, it’s a good idea to perform a water test to ensure there are no leaks. Splash water on the treated areas and check for any signs of moisture penetration.

7. **Tile Installation**: Once you are confident that your waterproofing is effective, you can proceed with tiling your bathroom. Use a suitable adhesive and grout that are also water-resistant.

8. **Regular Maintenance**: Waterproofing is not a one-time task. It’s essential to maintain your bathroom by resealing joints and corners as needed to ensure ongoing protection.

When to Call a Professional

While DIY bathroom waterproofing can be cost-effective and satisfying, there are situations where it’s best to call a professional. Here are some scenarios where professional help is advisable:

Complex Renovations

If your bathroom renovation involves significant structural changes, plumbing reconfigurations, or major fixture replacements, it’s wise to hire a professional. They can ensure that the waterproofing is integrated correctly into the overall project.

Large Bathrooms

Large bathrooms may require extensive waterproofing, which can be challenging for an inexperienced DIYer. Professionals have the skills and equipment to handle such projects effectively.

Time Constraints

If you have time constraints or limited availability, hiring a professional can expedite the renovation process. Professionals are well-versed in waterproofing techniques, which can save you time and stress. See more here.

Warranty and Insurance

Professionals often provide warranties for their work, giving you peace of mind in case issues arise. Additionally, having a professional work on your bathroom may be a requirement for insurance coverage.

Conclusion

In conclusion, bathroom waterproofing is a critical aspect of maintaining a functional, safe, and long-lasting bathroom. While DIY bathroom waterproofing is possible, it’s essential to assess the complexity of your project, your expertise, and available time before deciding whether to tackle it yourself or hire a professional.

Properly waterproofing your bathroom not only protects your investment but also ensures the health and safety of your household. Whether you choose to DIY or hire a professional, make sure that the waterproofing is done correctly to enjoy a watertight and worry-free bathroom for years to come.

How can I make my bathroom waterproof?

How to Make Your Bathroom Waterproof: A Comprehensive Guide

Bathrooms are among the most common areas in a home where water-related issues can arise. Whether it’s a small leak, moisture buildup, or full-blown water damage, these problems can be costly and challenging to address. Making your bathroom waterproof is essential to prevent these issues and ensure your bathroom remains in pristine condition. In this comprehensive guide, we will walk you through the steps and strategies to ensure your bathroom stays dry and damage-free.

The Importance of Waterproofing

Waterproofing your bathroom is not just about protecting it from unsightly stains and damage; it’s about safeguarding your home’s structural integrity and your family’s health. Here are some reasons why waterproofing is essential:

Preventing Water Damage

Water damage is not only unsightly but can also lead to expensive repairs. Leaks and seepage can damage your bathroom fixtures, walls, and flooring, and even spread to adjacent rooms if left unchecked.

How can I make my bathroom waterproof?

Mold and Mildew Prevention

Bathrooms are susceptible to high humidity and moisture, creating the ideal environment for mold and mildew growth. Waterproofing prevents these fungi from thriving, promoting a healthier indoor environment.

Longevity of Fixtures

Water damage can significantly reduce the lifespan of your bathroom fixtures and surfaces. Proper waterproofing ensures they remain in good condition for years to come.

How to Make Your Bathroom Waterproof

Now that you understand the importance of waterproofing, let’s delve into the methods and steps to make your bathroom waterproof:

1. Choose Waterproof Materials

Start with the basics by using waterproof materials for your bathroom’s construction. Opt for water-resistant drywall, cement backer boards, and moisture-resistant paint for the walls. For flooring, consider materials like ceramic tiles, porcelain tiles, or vinyl, which are naturally waterproof.

2. Seal Gaps and Joints

Water can sneak into your bathroom through gaps and joints in the walls and floors. Seal these areas using waterproof caulk or sealant. Pay special attention to areas around the bathtub, shower, and sinks.

3. Waterproofing Membranes

A waterproofing membrane is a critical component of bathroom waterproofing. You can install it under the tile or wall coverings to create a barrier that prevents water from penetrating the surface. There are various types of membranes, including sheet membranes and liquid membranes, each with its advantages. https://allsydneywaterproofing.com/

4. Water-Resistant Shower and Bathtub Surrounds

Your shower and bathtub areas are particularly susceptible to water damage. Ensure that the surrounds and enclosures are made from water-resistant materials like fiberglass or waterproof drywall. Properly seal the edges and corners to prevent water from seeping through.

5. Waterproofing the Bathroom Floor

The bathroom floor is constantly exposed to water and moisture. To waterproof it effectively, consider the following:

Install a waterproof underlayment beneath the floor tiles.
Use epoxy grout for tile joints; it’s highly water-resistant.
Seal the edges and corners of the floor with waterproof caulk.

6. Proper Ventilation

Proper ventilation is key to reducing humidity and moisture in the bathroom. Install an exhaust fan that can efficiently remove moisture from the air. Use it during and after showers to maintain a dry environment.

7. Regular Maintenance

Even after waterproofing your bathroom, it’s important to perform regular maintenance to ensure its longevity. Check for any cracks, loose tiles, or damaged seals, and address them promptly to prevent water intrusion.

DIY vs. Professional Waterproofing

While some aspects of bathroom waterproofing can be tackled as DIY projects, others may require the expertise of a professional. Here’s a breakdown of when you might want to consider each option:

DIY Waterproofing

Sealing gaps and joints.
Applying water-resistant paint.
Installing exhaust fans.
Regular maintenance and inspections.

Professional Waterproofing

Installing waterproofing membranes.
Replacing or repairing damaged drywall or flooring.
Addressing structural issues that contribute to water damage.
Complex tile and grout work in showers and baths.

The decision to hire a professional or do it yourself should be based on the complexity of the project and your comfort level with the necessary tasks.

Conclusion

Incorporating effective waterproofing measures into your bathroom construction or renovation is crucial to protect your home, your investment, and your family’s health. By choosing the right materials, sealing gaps, and using waterproofing membranes, you can create a watertight barrier that will keep your bathroom in top condition for years to come. Don’t forget that proper ventilation and regular maintenance play a vital role in the longevity of your bathroom’s waterproofing. Whether you decide to tackle this project as a DIY enthusiast or enlist the help of professionals, ensuring your bathroom remains waterproof is a decision that will pay off in the long run, saving you from costly repairs and maintaining a clean, healthy living environment.

What is the standard waterproofing for a bathroom in Australia?

The Standard Waterproofing for a Bathroom in Australia

Introduction

When it comes to renovating or constructing a bathroom in Australia, one of the most critical considerations is waterproofing. Proper waterproofing is essential to prevent water damage, mold growth, and other issues that can compromise the structural integrity and safety of your bathroom. In this article, we will explore the standard waterproofing practices and regulations for bathrooms in Australia.

What is the standard waterproofing for a bathroom in Australia?

Why Waterproofing is Crucial

Waterproofing is not just a matter of aesthetics; it’s a matter of protecting your home and ensuring a healthy living environment. Without adequate waterproofing, water can seep into the building structure, causing damage to walls, floors, and ceilings. Additionally, water damage can lead to mold growth, which can pose serious health risks to occupants.

In Australia, where the climate can be humid and prone to heavy rainfall, proper bathroom waterproofing is especially important. Without it, you may face costly repairs and health hazards in the long run.

Australian Standards for Bathroom Waterproofing

In Australia, there are specific standards and regulations governing bathroom waterproofing to ensure the highest level of protection. The key standard that addresses bathroom waterproofing is AS 3740-2010 “Waterproofing of Wet Areas in Residential Buildings.”

AS 3740-2010: Overview

AS 3740-2010 sets out the requirements for waterproofing in wet areas of residential buildings. Wet areas, as defined by the standard, include bathrooms, laundries, and toilets. Here are some of the critical aspects covered by this standard:

Material and Product Requirements: The standard specifies the types of materials and products that can be used for waterproofing. This includes membranes, sealants, and adhesives. All products must comply with the relevant Australian Standards.

Design and Installation: AS 3740-2010 provides guidelines for the design and installation of waterproofing systems. It includes information on substrate preparation, application methods, and curing times.

Surface Preparation: Proper surface preparation is essential for effective waterproofing. The standard outlines the steps to ensure the substrate is clean, dry, and structurally sound before applying waterproofing.

Testing and Inspection: The standard also requires testing and inspection to confirm that the waterproofing system meets the specified performance criteria. This may include water leak testing and visual inspections.

standard waterproofing for a bathroom in Australia

Maintenance and Repair: AS 3740-2010 offers guidance on the maintenance and repair of waterproofing systems. Regular inspections and maintenance can help prevent issues before they become major problems.

Professional Installation

To comply with AS 3740-2010, it’s crucial to have waterproofing work carried out by qualified professionals. They have the knowledge and expertise to ensure that the waterproofing system is installed correctly and meets all the necessary requirements. Hiring a licensed and experienced waterproofing contractor is a wise investment to protect your bathroom and your home.

Common Waterproofing Methods

Several common methods are used for bathroom waterproofing in Australia. The choice of method depends on factors such as the type of substrate, budget, and personal preference. Some of the most common waterproofing methods include:

Liquid Waterproofing Membranes: Liquid membranes are applied as a liquid or semi-liquid substance and then cure to form a waterproof layer. They are versatile and can be used on a variety of substrates, including concrete, cement sheets, and plasterboard.

Sheet Membranes: Sheet membranes are made of materials like polyethylene or bituminous sheeting. They are applied to the substrate in large sheets and are particularly effective for providing waterproofing in shower areas and around the bath.

Cementitious Waterproofing: Cementitious waterproofing involves applying a cement-based mixture to create a waterproof barrier. This method is suitable for concrete substrates and is often used in combination with other waterproofing methods.

Hybrid Systems: Some waterproofing projects may benefit from a combination of methods. Hybrid systems use multiple types of waterproofing to ensure comprehensive protection.

Maintenance and Inspection

Even with the best waterproofing system in place, regular maintenance and inspection are essential to keep your bathroom in good condition. Here are some tips for maintaining your bathroom’s waterproofing:

Inspect for Damage: Regularly inspect the bathroom for any signs of damage or wear and tear in the waterproofing system. Look for cracks, peeling, or discoloration.

Caulking and Sealing: Check the condition of caulking and sealing around fixtures, such as sinks, tubs, and showers. Replace any damaged or deteriorated caulk.

Drain Maintenance: Ensure that drains are free from blockages and are functioning correctly. Poor drainage can lead to water pooling, which may compromise the waterproofing. https://allsydneywaterproofing.com/bathroom-waterproofing-sydney/

Grout and Tile Maintenance: Keep grout and tiles in good condition. Damaged or missing tiles and grout can allow water to penetrate the substrate.

Ventilation: Proper ventilation in the bathroom helps reduce humidity, which can contribute to mold growth. Make sure your bathroom has adequate ventilation systems, such as exhaust fans or windows.

Conclusion

In Australia, proper bathroom waterproofing is not just a matter of aesthetics; it’s a legal and safety requirement. AS 3740-2010 sets the standard for ensuring that bathrooms in residential buildings are adequately protected from water damage and mold. By adhering to these standards and choosing the right waterproofing method, you can enjoy a beautiful, safe, and long-lasting bathroom. Remember that professional installation and regular maintenance are key to preserving the integrity of your bathroom’s waterproofing system. Don’t compromise on the health and safety of your home – make sure your bathroom is properly waterproofed.

Get a Free Quote