
The Importance of Waterproofing
Water can be a destructive force that can wreak havoc on your property. Whether it’s your home, office, or any other space, waterproofing is crucial to protect your investment and ensure the longevity of your structure. Waterproofing not only safeguards against water damage but also helps maintain the structural integrity of your building. What are the 4 steps to waterproofing?

Understanding the Basics
Before we delve into the four essential steps of waterproofing, it’s important to understand the basics of waterproofing. Waterproofing is the process of making a structure resistant to the ingress of water. It involves applying various materials and techniques to prevent water from seeping into the interior spaces.
Waterproofing is not only important for the external surfaces of a building, such as the roof, walls, and foundation, but also for areas prone to moisture inside, like bathrooms, basements, and kitchens. Let’s explore the four fundamental steps to effective waterproofing.
Step 1: Surface Preparation
The first step in any waterproofing project is surface preparation. This stage is critical as it sets the foundation for the subsequent steps. Surface preparation involves cleaning and inspecting the area to be waterproofed. Here’s what it entails:
- Cleaning: Remove all dirt, dust, debris, and any existing coatings or sealants from the surface. This ensures that the waterproofing materials adhere properly.
- Crack Repair: Inspect the surface for cracks, holes, or gaps. Seal any visible cracks with an appropriate sealant to prevent water from entering.
- Smooth Surfaces: Ensure that the surface is smooth and free of irregularities. If needed, use a leveling compound to create a flat, even surface.
Proper surface preparation is essential to ensure that the waterproofing materials bond effectively and provide long-lasting protection against water intrusion.
Step 2: Choosing the Right Waterproofing Material
Once the surface is prepared, the next step is selecting the right waterproofing material. There are various options available, each with its unique properties and applications. The choice of material depends on the specific requirements of your project and the area to be waterproofed. Some common waterproofing materials include:
- Waterproof Membranes: These are thin, flexible sheets that are applied to surfaces like roofs and foundations. They are highly effective at preventing water penetration.
- Sealants and Caulks: Sealants are ideal for filling gaps, joints, and cracks. They are commonly used in areas like bathrooms and kitchens.
- Waterproof Coatings: These are liquid-applied materials that form a protective barrier when they dry. They are versatile and can be used on various surfaces.
Consult with a professional to determine the best material for your specific waterproofing needs. The choice of material can greatly impact the success of your waterproofing project.
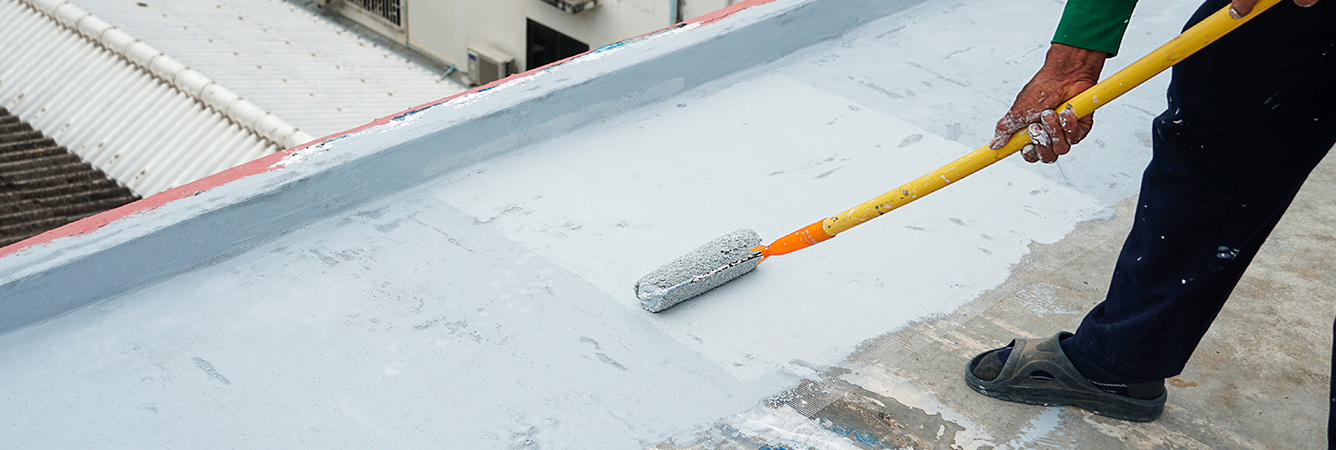
Step 3: Application of Waterproofing Material
With the surface prepared and the appropriate waterproofing material selected, it’s time to apply the material to the surface. The application method can vary depending on the material chosen and the area to be waterproofed. Here are some common application techniques:
- Brush or Roll: This method is commonly used for waterproof coatings and some sealants. It involves using a brush or roller to evenly spread the material on the surface.
- Spray: Waterproof membranes are often applied using a sprayer, creating a seamless and uniform protective layer.
- Trowel: Thick waterproofing materials may be applied with a trowel, allowing for better control and coverage on vertical surfaces.
It’s important to follow the manufacturer’s instructions and recommended application techniques for the chosen waterproofing material. Proper application ensures that the material forms a strong, watertight barrier that can withstand the elements.
Step 4: Quality Control and Maintenance
After applying the waterproofing material, it’s essential to perform quality control checks to ensure that the job is done correctly. Here are some key points to consider:
- Inspection: Examine the waterproofed area for any visible defects or irregularities. Look for signs of poor adhesion, bubbles, or areas where the material may not have been applied evenly.
- Testing: Some waterproofing projects may involve conducting water tests to verify the effectiveness of the waterproofing system. This can help identify any potential issues that need correction.
- Maintenance: Regular maintenance is crucial to ensure the longevity of the waterproofing. Inspect the waterproofed areas periodically and make any necessary repairs or touch-ups to maintain its effectiveness over time.
Remember that waterproofing is not a one-time task. It’s an ongoing process that requires attention and maintenance to keep your space protected from water damage.
Conclusion
Waterproofing is a vital aspect of building maintenance and construction. Whether you are protecting your home, commercial property, or any other space, these four steps to waterproofing—surface preparation, material selection, application, and quality control—lay the foundation for a dry and secure environment. By following these steps and investing in proper waterproofing, you can safeguard your property against the damaging effects of water and ensure its longevity. What are the 4 steps to waterproofing?